Industries that uses drones for roof inspections
At first, you might think there’s only one industry that does roof drone inspections. It’s home inspections, right?
And it’s true that home inspectors are one of the main groups of professionals that use drones to inspect roofs. But there are also several others.
Here they are.
1. Home Inspections
Home inspectors now commonly use drones for roof inspections.
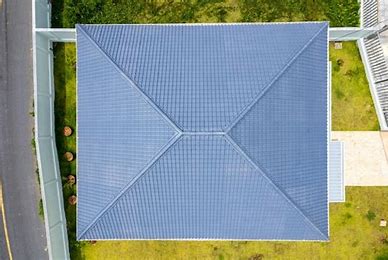
No good home inspection is complete without an inspection of the roof. Roofs are notoriously expensive to fix, and no home buyer wants to purchase a new home only to discover that the roof needs to be replaced.
Both home buyers and home sellers have been turning to roof drone inspections performed by home inspection providers to get a complete understanding of the condition of a property’s roof, without having to climb onto it and walk around.
In addition to home inspections during a potential sale, home owners also hire home inspectors to do roof inspections by drone when they suspect something may be wrong with their roof, so they can identify the problem and fix it before it gets worse.
2. The Insurance Industry
After a major weather event like a hurricane or tropical storm insurance companies expect a flurry of claims. And one of the most common claims is for damage to a home’s roof.
Insurance companies often send out drone pilots to collect aerial data throughout a neighbourhood right after a major weather event, quickly collecting data on all the homes impacted in the area where claims have been made, which can then be processed by insurance adjusters.
And the adjustors don’t have to be on site for their review.
They can wait safely in an office, or at home, and evaluate the drone data when it arrives. This approach helps insurance companies keep their adjusters out of potentially dangerous, unstable areas while speeding up their process times for claims, saving them money on the entire workflow.
3. Commercial Estate Agents
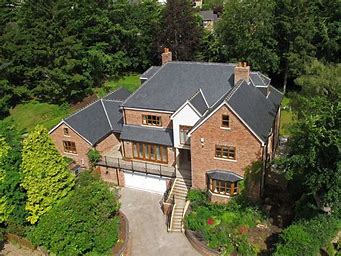
It’s not just home inspections that can benefit from roof inspections. Commercial property inspections can too.
Before a company or a potential investor buys a home, a drone inspection can help quickly evaluate the condition of the roof, surfacing any potential issues so they can be part of the purchase negotiation instead of making for an expensive discovery after the sale.
4. Solar Energy
To know whether a roof is suitable for a solar panel installation, you have to inspect it.
A drone can quickly get all the details needed to make a decision about whether a roof is a good candidate for solar panels, including its angle, structure, and how it’s oriented toward the sun. All of this information is crucial for determining whether a given roof can be used for collecting solar energy, as well identifying the best spot on the roof to place a panel, or multiple panels.
5. Construction
How do you know if your construction project is on track?
You can do a manual inspection, walking and climbing the entire site and collecting data. Or you can send a drone into the air and quickly get a lot more data than the manual process allows, including visual or LiDAR data that can be used to make a 3D model of the site.
Although the roof is only one part of a construction project, it’s an important part. And drones can collect data reflecting the current condition of the roof on a building that’s under construction, whether it’s a big capital effort, like a hospital, or a single-family residential home.
6. Infrastructure Maintenance
Commercial industrial facilities must be periodically inspected to ensure they stay in good working order.
These inspections are generally referred to as infrastructure inspections—this could be the inspection of a warehouse or factory, or it could be the inspection of an industrial asset, like a boiler, pressure vessel, or even a massive grain silo.
For all of these efforts, inspecting the roof is a key part of the infrastructure maintenance work. And in some cases, such as after major weather events or incidents such as felled trees, the roof may be the only area that needs to be inspected.
Step by step guide to drone roof inspection
Wondering how you actually do a roof drone inspection?
Here are all the steps you need to know, in order.
Step 1—Get Ready with a Pre-Inspection Checklist
Ahead of the actual inspection, make sure you’re ready to go by checking all of these things:
- Batteries. Ensure your drone’s batteries and backup batteries are fully charged.*
- Your SD card. Check your drone’s memory card to make sure it has enough space for the data you plan to collect.
- Your camera settings. Check your drone’s camera settings to make sure it’s ready to get the shots you need.
- Your drone hardware. Check your drone’s sensors, propellers, and airframe to make sure they’re all looking good and ready to fly.
- The weather. Make sure the weather will be good enough to allow you to fly.
- The airspace. Make sure you have all the proper permissions in place to fly in the airspace where the roof you plan to inspect is located. Look for whether you need authorisation from CAA, and whether any flight restrictions are in place
*Pro tip: Keep in mind the full amount of flight time you expect to need and make sure you’ll have enough batteries to achieve that amount of time in the air, especially if you plan to do multiple inspections and don’t have a way to recharge.
Step 2—Safety Measures
Consider establishing a safe operating area around the property where you plan to fly. Doing this helps you avoid property damage or injuries in the event that your drone fails, and falls out of the sky.
Keep in mind that any kind of roof inspection with a drone is considered work. (Even working for barter or doing free work that has a commercial benefit, such as a donation of a drone roof inspection, is still considered work by the CAA, and requires the appropriate licence and insurance.
Finally, make sure you’re in compliance with any drone laws related to drone operations where you plan to fly.
Step 3—Plan Your Flight
Your gear is ready, the weather looks good, and you’re legally compliant.
Now it’s time to plan your flight path.
Use mapping software to plan your drone’s flight path. The path should provide thorough coverage of the roof, giving you angles of it from several perspectives to ensure you get all the data you need for your inspection.
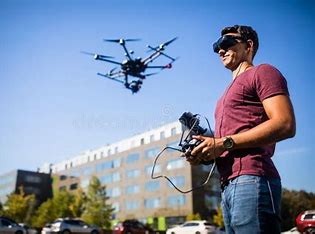
Step 4—Fly!
You’ve done your prep, and now you’re ready—put your drone in the air and get the data you need!
Remember, as you’re flying the drone should be capturing high quality photos and/or video of the entire roof. If you see areas of concern on the roof, like a damaged chimney or skylight, spend more time there so you’ll have more data to review once you land.
In addition to damage, you may also be looking for areas that need maintenance, such as gutters filled with leaves, gunk, or snow, damage from birds, wasps, or other creatures, or backed-up scuppers or drains.
Step 5—Create Your Information
After you’ve collected all your roof inspection data, it’s time to process it for your client.
Using drone roof inspection software, you can stitch your drone photos together to make a complete detailed visual map of the roof.
Once you have all your photos, videos, 3D models or other outputs, then it’s either time to analyse them yourself, carefully reviewing them for signs of damage, or to pass them on to a subject matter expert for review.
Step 6—Create a Report*
Using your information, put together a report that details the key findings from the roof inspection, highlighting the potential problems your inspection found on the roof.
*This last step may not be part of your work. You may only be tasked with collecting the data, processing it, and sharing it with a roof inspection expert or insurance adjustor (depending on the purpose of your work). Not everyone who’s doing a drone roof inspection will actually be tasked with inspecting the data they collect.